Github用久了就覺得這一切真是太方便了!!但是呢,有些程式碼就是不太方便放在別人那邊,不管自己寫的code是不是有到那種程度,人就是想把屬於自己的東西留給自己欣賞,這個時候Gitlab就是你的救星啦!!!
安裝Rvm Ruby
$ curl -L https://get.rvm.io | bash -s stable --ruby
$ rvm install 1.9.3
$ rvm use 1.9.3
$ rvm rubygems latest
下載並安裝git-core
$ cd /tmp
$ wget 'https://git-core.googlecode.com/files/git-1.7.11.tar.gz'
$ tar zxvf git-1.7.11.tar.gz
$ cd git-1.7.11
$ ./configure
$ make
$ make install
安裝Gitlab所需套件
$ yum install openssl openssl-devel zlib zlib-devel mysql mysql-devel sqlite sqlite-devel libicu-devel
$ wget 'http://peak.telecommunity.com/dist/ez_setup.py'
$ python ez_setup.py
$ easy_install pip
$ pip install pygments
安裝Redis
我自己覺得Redis有點像Memcache,底層的實作我就不太清楚。
$ wget 'http://redis.googlecode.com/files/redis-2.4.15.tar.gz'
$ tar xzf redis-2.4.5.tar.gz
$ cd redis-2.4.5
$ make
$ make install
$ cd utils
$ ./install_server.sh
$ mkdir /etc/redis /var/lib/redis
$ cp src/redis-server src/redis-cli /usr/local/bin/
$ cp redis.conf /etc/redis/
將設定值修改如下:
$ vim /etc/redis/redis.conf
daemonize yes
bind 127.0.0.1  /home/git/.profile'
$ sudo -u git -i -H /home/git/gitolite/src/gl-system-install
$ cp /home/gitlab/.ssh/id_rsa.pub /home/git/gitlab.pub
$ chmod 777 /home/git/gitlab.pub

$ sudo -u git -H sed -i 's/0077/0007/g' /home/git/share/gitolite/conf/example.gitolite.rc
$ sudo -u git -H sh -c "PATH=/home/git/bin:$PATH; gl-setup -q /home/git/gitlab.pub"
修改資料夾權限及擁有者
$ chmod -R g+rwX /home/git/repositories/
$ chown -R git:git /home/git/repositories/
測試Gitlab是否可以正常下載Gitolite管理檔案庫
$ su - gitlab
$ git clone git@localhost:gitolite-admin.git /tmp/gitolite-admin
$ rm -rf /tmp/gitolite-admin
$ exit
設定Gitlab
$ gem install charlock_holmes
$ gem install bundler
$ bundle install
$ su - gitlab
$ git clone http://github.com/gitlabhq/gitlabhq.git gitlab
$ cd gitlab
使用MySQL,複製設定檔,修改資料庫登入帳號及密碼
$ cp config/database.yml.mysql config/database.yml
修改gitlab.yml
$ cp config/gitlab.yml.example config/gitlab.yml
$ vim config/gitlab.yml
## GitLab settings
gitlab:
  ## Web server settings
  #host: localhost
  host: git.ocomm.com.tw  這個步驟當時搞好久,結果是要自己先建立資料庫...

$ bundle exec rake gitlab:app:setup RAILS_ENV=production
確認狀態
$ bundle exec rake gitlab:app:status RAILS_ENV=production
Passenger佈署Gitlab
Gitlab也需要伺服器來運作,可以選擇Nginx,但是因為我慣用Apache所以選擇用Passenger,官網這邊有詳細的流程介紹,他的安裝非常方便。
$ gem install passenger
$ passenger-install-apache
$ passenger start
添加gitlab的VirtualHost
$ vim /etc/httpd/conf.d/httpd-vhosts.conf
<virtualhost>
    ServerName git.ocomm.com.tw
    DocumentRoot /home/gitlab/gitlab/public

    # !!! Be sure to point DocumentRoot to 'public'!
    <directory>
        # This relaxes Apache security settings.
        AllowOverride all
        # MultiViews must be turned off.
        Options -MultiViews
    </directory></virtualhost>
若在網頁上出現錯誤訊息 No such file or directory – git ls-files 請執行以下指令
$ ln -ns /usr/local/bin/git /usr/bin/git
啟動伺服器測試
$ bundle exec rails s -e production
預設帳號密碼是:admin@local.host / 5iveL!fe

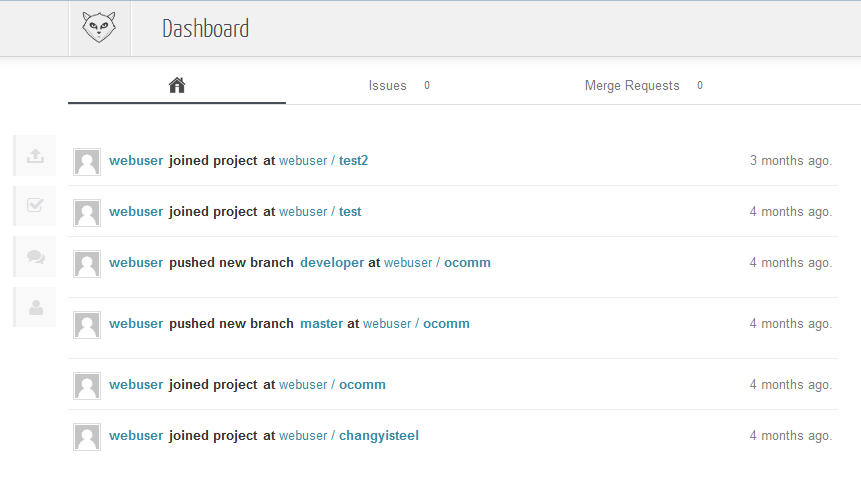
太爽啦。完成了。就是長這樣!!! 建立帳號登入看看吧

參考資料: